Monday, February 20, 2012

Berry Cake

One of Matt's most endearing qualities is his tendency to get fixated on things. We've been talking about doing cake tastings for our weddings, with a particular mind to our favorite Whole Food's cake, Berry Chantilly Cream. Then our friend Erin texts us a picture of a white berry cake that she made. And we're fixated. We originally thought we'd make a king cake for Carnivale/Mardi Gras. Then we remembered that king cakes aren't really that tasty. So the berry cream fixation came back up.

We've been working our way through tasty recipes in our new Cook's Illustrated Cookbook (amazing!) And it turns out there is a strawberry cream cake recipe! Score.


In other news, I bought some excellent knobs from Anthropologie on discount. I frequently wander the store looking at the bizarre collection of knobs, knick-knacks, and dishware. So a sale rack was hard to resist. I thought I'd make a rack to hang my numerous necklaces on so that I could use the top of my dresses for something other than a pile of necklaces. And I finally got around to it. I got a foot of baseboard for a buck at Home Depot and sanded it to make it look weathered. You know, cause that's in.


Strawberry Cream Cake
from Cook's Illustrated
  • 1 cup sugar
  • 1 1/4 cups cake flour
  • 1 1/2 tsp baking powder
  • 1/4 tsp salt
  • 5 large eggs (2 whole and 3 separated), room temp
  • 6 Tbsp unsalted butter, melted and cooled
  • 2 Tbsp water
  • 2 tsp vanilla
  • pinch cream of tartar
  1. Grease a 9-inch cake pan or springform pan, line with a parchment paper cut to fit the bottom and grease the parchment. Reserve 3 Tbsp sugar. Whisk flour, baking powder, salt, and remaining sugar in a medium bowl. Whisk in 2 whole eggs and 3 egg yolks, butter, water, and vanilla until smooth.
  2. Whisk egg whites and cream of tartar until foamy on medium-low. Increase speed to medium-high and whip whites until soft and billowy. Add the reserved 3 Tbsp sugar and whip until soft peaks form (about 1-2 minutes). Stir one third of the whites into the batter, and gently fold in the rest.
  3. Pour batter into prepared pan and bake 30-40 minutes. Let cake cool 10 minutes, then invert and let cool completely out of pan, about 2 hours.
  • 2 pounds strawberries (or other berries)
  • 4-6 Tbsp sugar (depends on sweetness of berries)
  • 2 Tbsp kirsch
  • 8 oz. cream cheese
  • 1/2 cup sugar
  • 1 tsp vanilla
  • 1/8 tsp salt
  • 2 cups heavy cream, chilled.
  1. For the filling, halve 24 of the strawberries for garnish and mix the remainder in a bowl with 4-6 Tbsp sugar. Let sit one hour. Strain juices and reserve. Pulse the berries briefly in blender or food processor. Simmer reserved juices and kirsch over medium-high until reduced to 3 Tbsps (3-5 minutes). Pour reduced syrup over berries, add salt and toss.
  2. For the whipped cream frosting, whip cream cheese, sugar, and vanilla until light and fluffy. Ad heavy cream slowly while mixing and ship on medium-high until stiff peaks form.
  3. To assemble, cut the cake horizontally into three layers.
  4. Place one layer on a plate, place a ring of 20 strawberry halves around the outside (tops out) and fill with half of the filling. Frost is 1/3 of the whipped cream. Repeat with the second layer. After placing the third layer, frost the remaining cream on top and garnish with remaining berry halves.
By the way, the frosting is the best ever.

Wednesday, February 15, 2012

More chocolate please

I've been doing a lot of crafting in the last few months. I never really got into knitting (too ADD?), but when a friend recently showed me how to wire wrap my own earrings, I went a little nuts. And once I had an absurd amount of dangly earrings, I needed a better place to store them than on the bathroom counter. Here's my solution. Fine black plastic mesh in a picture frame. I feel so clever. Now I have to stop making earrings. I am also planning to make a wedding quilt in lieu of a guestbook. Not that I've ever made anything using a sewing machine unless I was supervised by a pro seamstress. We'll see how that goes in a few months.


I'm always looking for a cookie/brownie that maximizes chocolate per bite while not getting dry or otherwise unpleasant. I've had this recipe on my "to bake" list for a couple of months now. Not sure how I only just made them. Yes, they do take the equivalent of two normal-sized bags (24 oz.) of chocolate chips per batch. I didn't try the recipe that calls for 42 oz. Patience, grasshopper.


Chocolate Chubbie's
adapted from Sarabeth's Bakery

  • 1 stick (8 Tbsp) unsalted butter, cut into 1/2-inch cubes
  • 12 oz. semisweet chocolate chips (or 9 oz. bittersweet + 3 oz. unsweetened)
  • 1/2 cup flour
  • 1/2 tsp baking soda
  • 1/4 tsp salt
  • 3 eggs, at room temperature
  • 1 cup sugar
  • 2 tsp vanilla
  • 12 oz. (2 cups) semisweet chocolate chips
  • 2 cups coarsely chopped walnuts (or with half pecans)
  1. Position racks in center and top third of oven. Line two baking sheets with parchment paper
  2. Bring 1 inch of water to a boil in a medium saucepan. Put the butter in a metal bowl and melt over the water. Add 12 oz. of chocolate and stir until melted and smooth. Remove from heat and let sit for 5 minutes to cool.
  3. Stir together flour, baking powder, and salt in a little bowl.
  4. Whip the eggs with your fancy mixer or whisk until foamy. Add sugar and vanilla and whip for 3 more minutes until very thick and pale yellow. Beat in the lukewarm chocolate mixture. Gradually stir in the flour mixture by hand. Stir in the remaining chocolate chips and nuts. Dough will be softer than most cookie dough.
  5. Scoop batter by 2 Tbsp-fulls onto pans, placing them 1-1/2 inches apart. Bake, switching positions halfway through, for 17-20 minutes, until the edges are set. Don't overbake them (though the batch I overbaked was delicious once you gummed them a bit. . .). Cool completely before storing.

Oops. The cookie that broke obviously needs to be culled from the pack.

Sunday, January 29, 2012

Changes

Hi there,

I wanted to let you all know that I'm not renewing my breadsandthreads.com domain, but this blog will still be accessible at breadsandthreads.blogspot.com. And I now have yet another blog. Matt and I are getting married this summer, and we started a blog about our wedding plans, which we hope to continue after we're married to keep everyone up to date on our lives. It's at Haggerling. I will still post recipes to this blog.

We had an amusing experience at Whole Foods yesterday. Boulder is funny. We were getting a sample of bread, and the lady behind us said "Does this have yeast in it?" Matt and I both looked at her like she was crazy. The woman giving samples checked the ingredients: wheat flour, salt, sourdough starter. . . No yeast. Matt felt the need to clarify that sourdough starter has yeast, and that is indeed why the bread is not a brick. The woman who asked felt the need to inform us that people have been using sourdough starters for centuries and seemed satisfied that there was no yeast in the bread. Really?

Sunday, November 6, 2011

Fun with Dad in Denver

Sometimes people in Colorado are surprised that I am dedicated to moving home to Minnesota after finishing this dumb degree. Sure, Colorado is amazing, and I very very blessed to have the opportunity to live here for a few years. But Minnesota is home. Or more accurately, Minnesota is family. Almost my entire extended family lives in the Twin Cities area. And most importantly, my parents and siblings are there. Probably for good. We're a bunch of homebodies.

I am very lucky in that my family members come to visit Colorado pretty often. Conferences, ski time, and mountain time are all prime chances for visits. For example, my dad was in Denver this weekend for a conference, and my mom is here next weekend.


Dad and I went out in Denver for the afternoon yesterday. We visited the Denver Art Museum, which is in an awesome, castle-like building. They had a pretty cool Asian exhibit, and a Western American section, which I've never seen before. I also had my first Tattered Cover experience (awesome local bookstore). Went out at to the Corner Office and got a bowl of fried, salted peppers for an appetizer. And holy crap, my phone camera has a flash. . . This picture was after we had eaten about 1/3 of them. They were so addicting.


Dad ordered the signature chicken and waffles, and we both had a difficult time processing the maple syrup + chicken combo, but it was delicious. Even more delicious was my fresh tagliatelle with bolognese. So good in fact, that I scarfed it down before taking a picture. While walking about earlier, we saw a Johnny Rocket's, and decided after dinner that we needed a milkshake. Milkshakes!

And the best part of being a milkshake is that when you get a milkshake, you get TWO MILKSHAKES.

Sunday, October 30, 2011

Halloween the fun way


Halloween was way more awesome when we were little. You got to dress up in order to walk around outside and get candy. These days, it seems like people dress up in order to go into cramped indoor places with loud music full in order to get beer and hang out with drunk people. Total lose. Matt and I spent yesterday in our jammies making deliciously seasonal soup and playing computer games and reading Winnie-the-Pooh (ok, that was just me). Hard to think of a better way to spend a day/evening.


The deal with this recipe is you get to make your own strudel dough i.e. phyllo dough. Phyllo has always been one of those mysterious ingredients that seemed impossible to make on your own. Not so. Haha

Apple Strudel

For the filling:

  • 1 Tbsp cinnamon
  • 6 Tbsp toasted bread crumbs
  • Rind of 1 lemon
  • 1 cup sugar
  • 3/4 cup raisins
  • 8 cups finely chopped apples (~6 apples)
  1. Combine ingredients.
For the dough:
  • 1 1/2 cups flour
  • 1/4 tsp salt
  • 1 beaten egg
  • 1/3 to 1/2 cup warm water
  • 1/4 tsp vinegar
  • 2 tsp melted butter
  1. Combine ingredients and knead for 10 minutes until the dough is silky, adjusting water/flour content as needed.
  2. Brush the surface of the dough with melted butter and roll as thin as possible.
  3. Stretch the dough being careful not to tear it. If it tears easily, it probably needs more kneading. The dough should stretch an unbelievable amount, to about a square yard.
  4. Cut the edges off of the dough, as they will be think and bulgy.

For assembly:
  • 6 Tbsp melted butter
  1. brush the dough with melted butter and place filling is a log on one end. Carefully roll the strudel, making sure that the ends are covered with dough. It's ok if the dough rips, as you'll have a lot of layers. Brush the rolled strudel with more melted butter and bake for 20 minutes at 400F, then at 10 350F for 10 minutes.

Friday, October 14, 2011

adventures in chai

I have a strange relationship with tea. Namely, I'm an Asian girl who doesn't like tea. Sometimes, I'm curled up on the couch with a book when the weather is yucky, and I think. . . hey, some tea would be nice. And it never is. I do like sweet milk tea though. When in Nepal or India, I always was excited for tea when I visited someone. Since moving to Boulder, I have become a major fan of Bhakti Chai, which is a local type of chai that is sold in a lot of coffee shops around. It is wonderfully spicy and gingery. (Yes, I know the predominant flavor in chai is supposed to be cardamom, not ginger. But I don't like cardamom.) I've been a little worried about being disappointed with chai for the rest of my life. So I tried making it at home. I plan to use even more ginger next time.

Bhakti Chai Concentrate Imitation
  • 4 cups water
  • 5 black tea bags
  • 4 inches fresh ginger, sliced (~1/2 inch diameter)
  • 1 cinnamon stick
  • 1 piece star anise
  • 6 cardamom pods
  • 1/4 tsp black pepper
  • 1/2 cup crystallized ginger pieces, sliced.
  • 1/2 cup brown sugar
  1. Put tea bags, sliced ginger, cinnamon, anise, cardamom, and pepper in a medium saucepan. Add water and bring to a boil. Simmer for 5 miunutes.
  2. Meanwhile, oil your chefs knife and slice the crystallized ginger as thin as you can. Combine the crystallized ginger and sugar in a food processor and pulse until large pieces or ginger are broken up.
  3. Turn off the heat and add the ginger-sugar mixture. After 5 minutes of steeping, remove the tea bags, and let the spices steep for another 30 minutes. Strain and store in the fridge.
  4. Combine with equal parts milk and serve hot or cold.

Progress


This picture is a lot more exciting that it might look. This week was a big milestone in my PhD project, as I started my field project. I've been working on developing a new antimicrobial concrete coating and finally finished some samples to place in a manhole. Yay! It's something that's been stressing me out since May, and it feels really good to get things rolling.

We had a night on the town last night (Barnes and Noble and the Pearl Street Whole Foods). I should probably never be unattended in a bookstore, as I get way too excited about many things and disturb other patrons. Like illustrated books covering all of science. And crayons (not sure why they had crayons). And bookends.

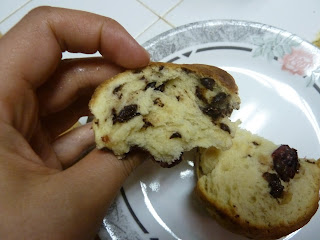
Village Baker's Holiday Cranberry-Orange Bread
from A Passion for Baking

  • 1/3 cup warm water
  • 5 tsp rapid-rise yeast
  • 4 to 5 cups flour
  • 3/4 cups warm milk
  • 3/4 cup butter, melted
  • 1 egg
  • 3 egg yolks
  • 1 tsp salt
  • 1 1/3 tsp sugar
  • 1 tsp vanilla
  • 1/2 tsp orange oil (I used zest)
  • 1 1/2 cups coarsely chopped fresh or frozen cranberries (I used dried)
  • 3/4 cups minced chocolate chips
  1. Dissolve yeast in water and let stand 2 minutes to dissolve. Add 1 cup flour and milk, butter, eggs, salt, sugar, vanilla, and orange zest. Add 3 cups of flour and knead, adding more flour as needed, for 10 minutes.
  2. Form dough into a ball, oil, and let sit covered in bowl or on counter for 30 minutes to an hour until doubled.
  3. Grease a 9-inch springform pan, and place it on a baking sheet.
  4. Gently deflate dough and press into a rectangle. Dump cranberries and chocolate on top and fold into the dough. Let the dough rest 15 minutes and then shape into 12 balls. Arrange the balls in the pan. If you like lovely browning, brush with a whisked egg. Cover with plastic wrap and proof 45-60 minutes.
  5. Prehead oven to 350F. Bake bread until browned, 40-50 minutes. Cool.


mmm delicious.